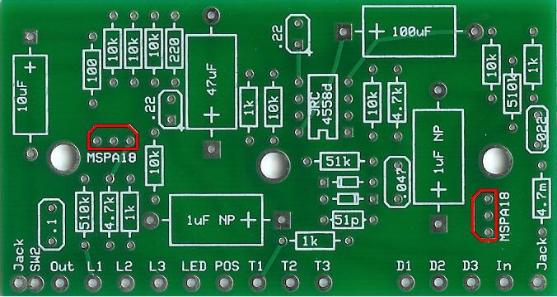
Make sure that they are orientated
so that they match up with layout
sticker.

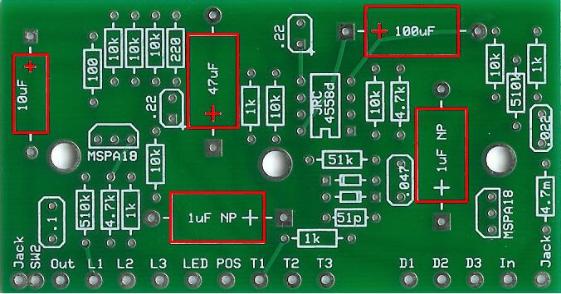
capacitors. The two 1uF's are
not polarized and can go in any
direction. The 100, 47, and
10uF caps are polarized so
make sure you have them facing
in the correct direction. There
will be a strip of black arrows
running down the side that point
to the negative end. Another
way to tell which is neg and
which is pos is that the pos end
will have a rubber stopper and
the neg end will have a metal
cap.

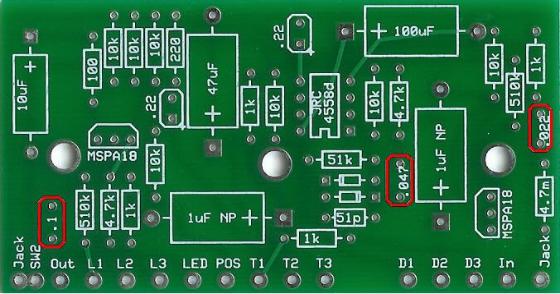
film caps. These are the dark
green caps that look like
chiclets. They are not
polarized so they can go in any
direction. Note that you will
only use 3 of the 4. The .22uf
cap is part of the mod kit
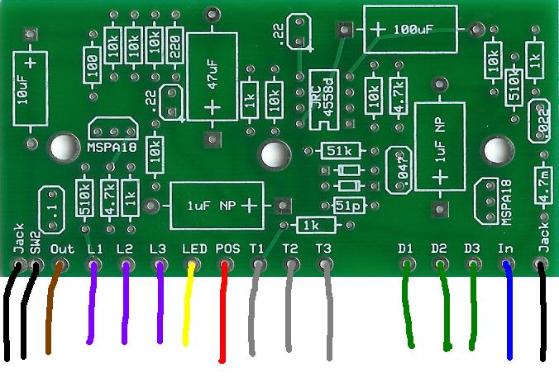
wiring. None of the wires need to
more than 3 inches long. This is
another step with a lot of
soldering, so take your time.