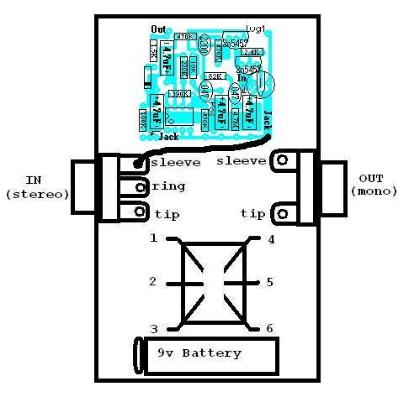
Step 9:
Measure and trim the black wire on the right connected to the
hole labelled "jack" so that it is long enough to connect to the
sleeve of the IN jack. Strip 3mm off the end of the black wire
and solder it to the sleeve of the IN jack. Note: The black wires
connected to the holes labelled "jack" will complete the ground
circuit. The will go to the sleeves of the jacks. It makes no
difference which jack they go to. If you don't have any
problems stripping such a short piece of wire, you can connect
them to the closer jack. In the directions here, I connect them
to the farther jacks in steps 9 & 10 because it is easier to work
with the longer wire.
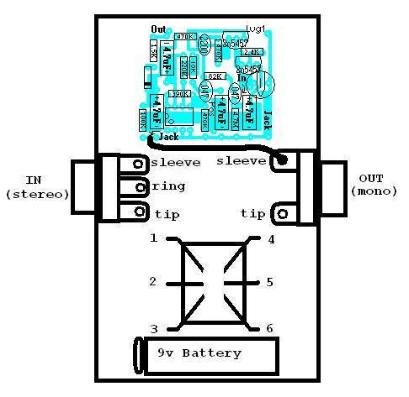
Step 10:
Repeat step 9 for the black wire on the left but connect it to the sleeve of the out jack.
You are now basically done with your squeezer clone. Go to the "finishing touches and trouble shooting" section now.
But remember not to attach your circuit board to the back of the 10K pot untill you know that the pedal works. Also, if
pin 8 of the JRC4558D or any of the copper traces directly connected to pin 8 on the underside of the board touch
ground while the pedal is plugged in and powered it will fry the op amp. It shouldn't be too much of a problem, but just
be careful of that. And remember that you may have to tweek the trim pot a little. If your squeezer sounds a little
fuzzy, this means that you need to adjust the bias. Congratulations!